Recently, i had the opportunity to open up a 2022 Lenovo thinkbook 14 g4 notebook to add ram. Which is pretty straightforward.
And here are the images.
** FCOH is not responsible for any misinformation provided or any damage caused to your system by following the steps to dismantle your laptop **
Always ensure laptop is powered off before performing dismantling acts!
1) Ensure that the table is flat and doesnt have any protruding debris on it.
2) Flip the laptop over. The base should be facing you.
Image as below

3) Notice that there is a total 10 philip cross head screws. (3 at top row, 3 at middle and 4 at base, circled in red) Loosen them.
** Noticed the gap lines between the base and handset panel? (Highlight in blue rectangle)
4) Once the screws are loosen, use a plastic spudger to pry the gap lines to create an opening to start removing the base. Do not use too much force to avoid damage to the physical cover
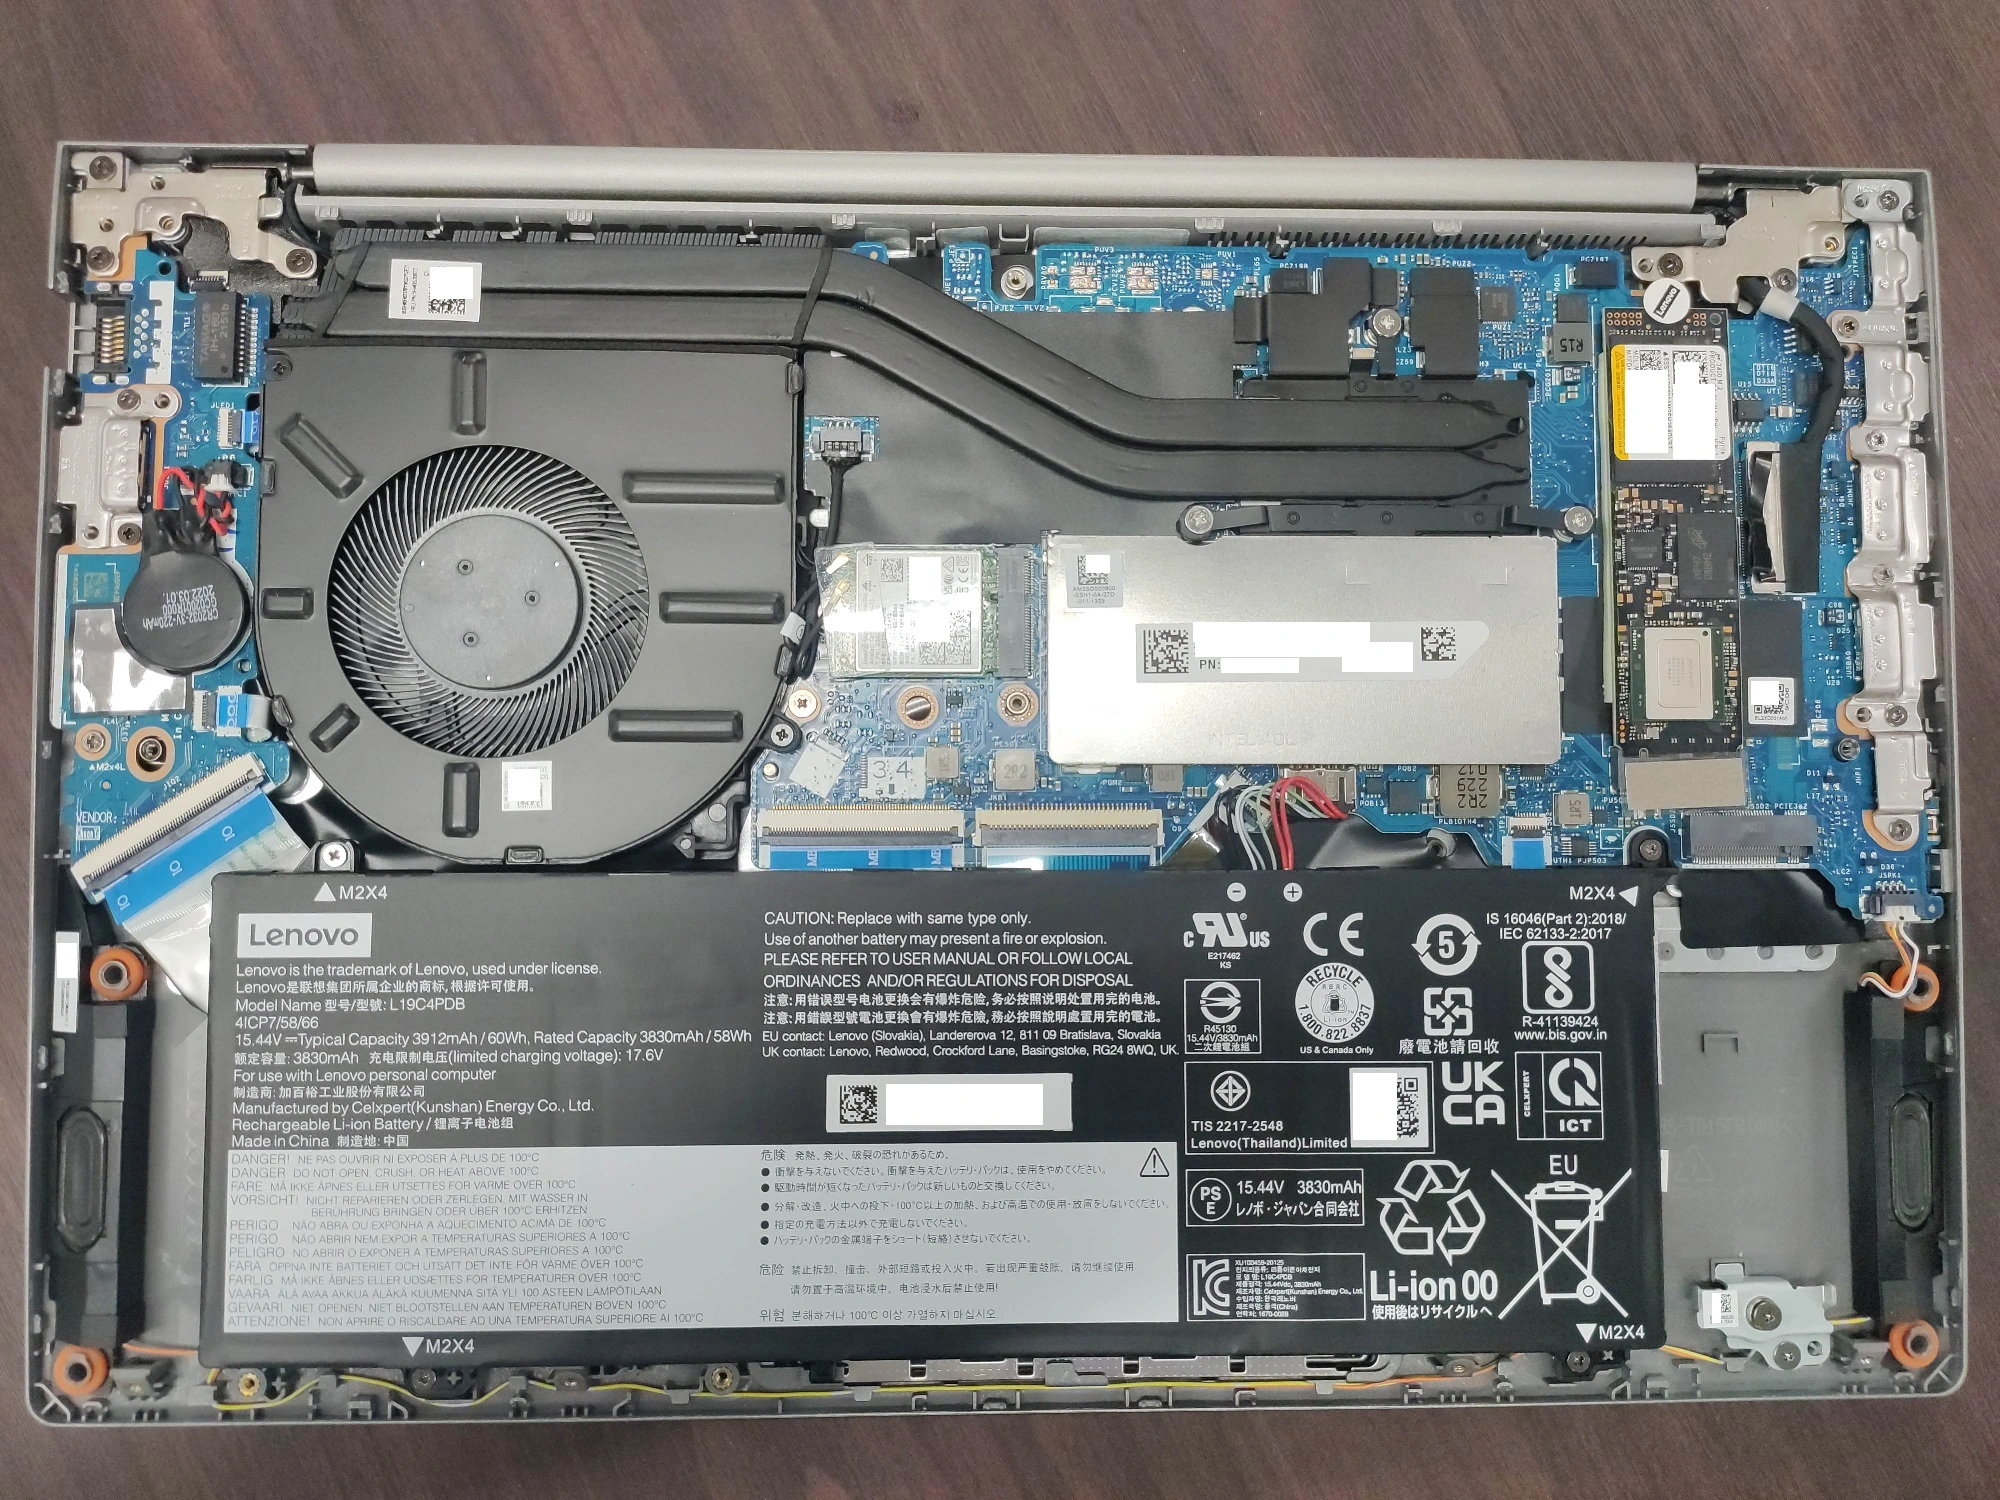
5) Once opened up, you the see the lenovo thinkbook 14 G4 internals (as below)
This is the intel version of the Lenovo TB14 Gen4 internal components.
Quick glance ( (left to right, mid row)
CMOS battery, CPU fan, Wifi module card, cover plate for ram (ram slot is below the cover), SSD
Black rectangular component with wordings and icon is the battery.
** Remove the battery connector before removing or adding any components. **
6) Remove the silver color cover in the middle of the laptop and you should be able to see the ram slot. Add in the ram and you are done!
7) Reverse the steps to cover the notebook back.
** Remember to connect back the battery connector!
Time needed: Around 15 min
For more info, you may refer to lenovo hardware maintenance guide here