There could be various factors that caused the desktop system not to be able to power on. Typically, the core reason will be likely to be a hardware issue. Which will be internal components issue such as power supply or the mainboard. However, there are other external factors which could cause your desktop computer pc not to power on.
Who this troubleshooting guide is for
To be cleared, this guide is meant to troubleshoot desktop computer pc which cant be powered on with the following symptoms. When the power button on the casing is being pressed,
- No Fan sound from the casing
- The cpu fan doesnt spin (if you are using air cooler). If you are using water cooling system, check if your radiator fan spins.
- No LED lit up on casing (if it used to lit up)
- And of course, no display on the monitor, since the desktop doesnt send a response to it (because it cant power up)
If the fan spins continuously or it spins and stops, or LED on desktop casing does lits up but without display on the monitor, this troubleshooting guide might not apply to your problem.
How to tell if cpu fan is spinning (image below)
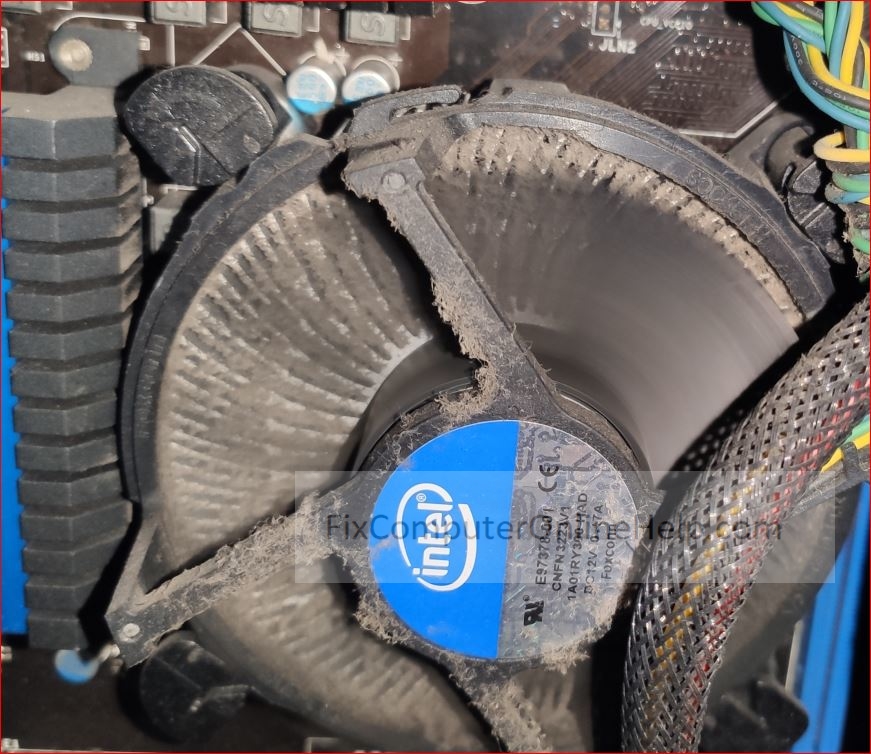
If the fan is not spinning, you will be able to see the fan blades. You might need to open the side panel to see the interiors of the desktop components.
This portion of hardware troubleshooting places the assumption that the system is operating well during the previous usage
You may wish to perform a waterfall troubleshooting in the following sequential order.
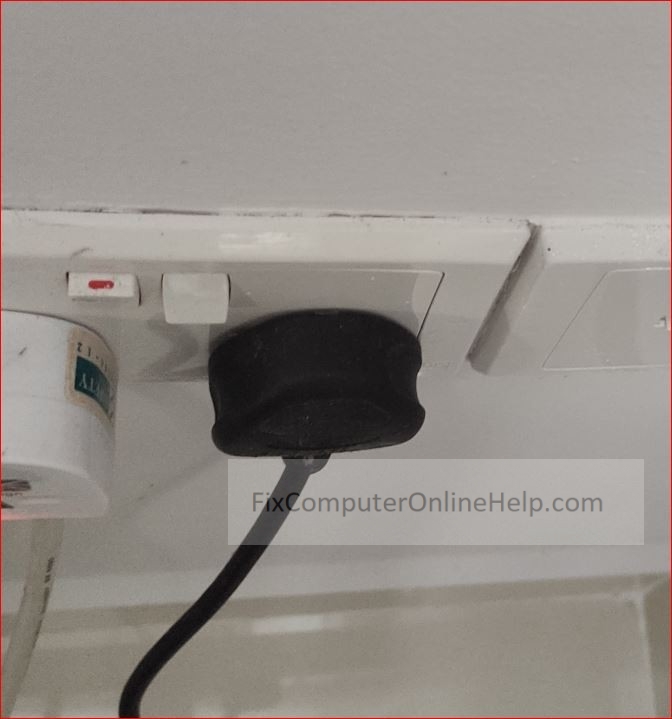
1) Check if the wall socket switch or power extension is off.
Sometime human error occurs. Turning it on should resolve the problem.
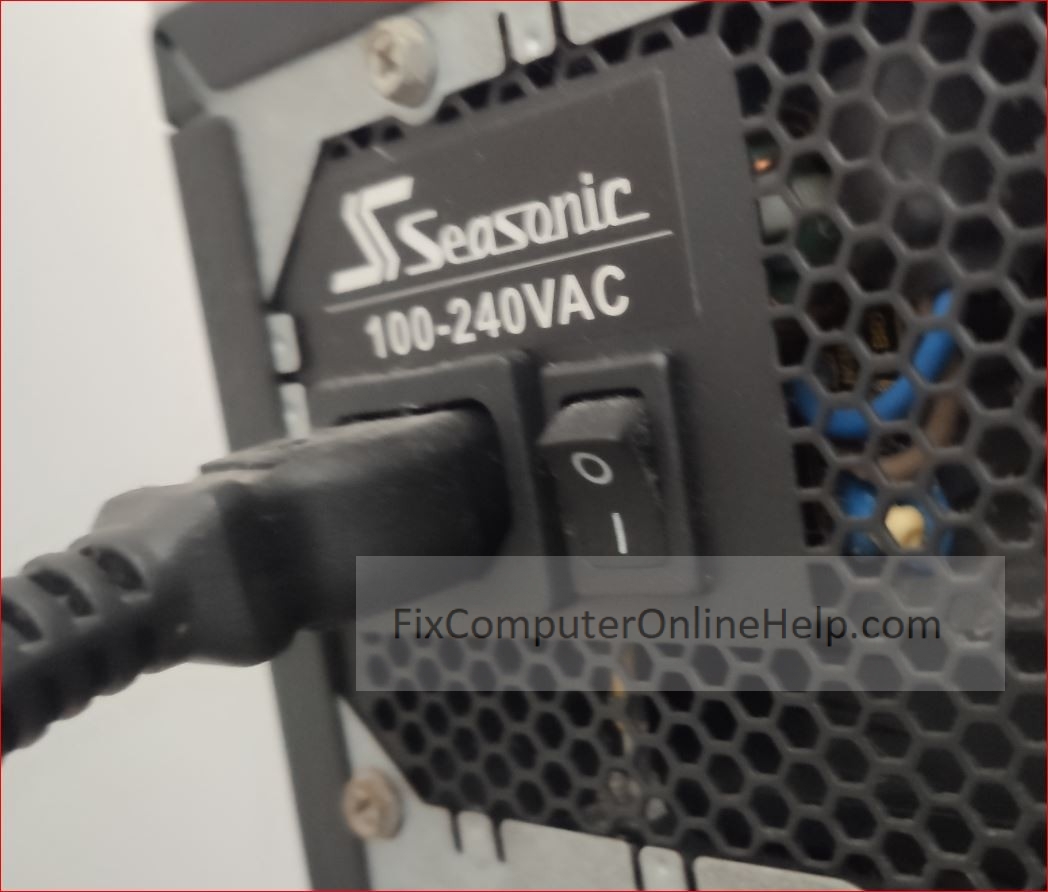
2) Check if the power supply switch is off.
Sometime human error occurs. Some power supplies come with an on off switch. Flicking it on should resolve the problem.
3) Reinsert the power cables
If checking the power switches do not work, try to pull the cable out from both the power supply’s end and the wall socket or power extension and re insert the cable in firmly again. This will troubleshoot any contact point issue. (quite rare to occur)
4) Change the external power cable
There are some rare scenarios where the power cable is faulty. If you got not have a new cable, try to swap it with your monitor. Some monitor uses the same type of power cable. (rare scenario)
5) Connect directly to wall socket
If you are using a power extension strip, try connecting to the wall socket, preferably not the same socket which your power extension strip is connected to.
Take note: DO NOT carry out the steps below if you are not confident to do so, as additional damage could occur!
6) Check the internal power connectors (From power supply box to the mainboard)
Open the side panel of your desktop casing to have a look of the internals of the system. Ensure that the 24 pins, 4+4 pins and possibly the PCIE power connector (graphics card. For some systems, they do not required the PCIE connector)
They are usually secured by a clip and it locks when these cables are pushed in to connect to the mainboard or graphics card. Unclip these connectors and re insert them firmly again.
7) Remove recently added on component
Skip this step if you have not add in any new internal hardware recently. If you have added in new hardware such as ram or graphics card, remove them to check if it will resolve the issue where your desktop computer cant be turned on.
8) Strip the system down to bare minimum working component (Advanced troubleshooting)
If you have more than 1 stick of ram, remove all but leave one stick connected to the motherboard.
If you have a dedicated graphics card, remove it as well. Remove all sata power connectors and cables. So that the setup is left with only the processor, cpu fan, 1 stick of ram and the mainboard. Remove the front usb connectors, front audio connectors, and remove any USB dongles, keyboard. Remove any fan connectors on the mainboard, other than the CPU Fan.
And attempt to power on again.
If it cant work, and if you have more than 1 stick of ram, remove existing stick and use another ram stick in another ram slot on the motherboard.
If it powers on at this stage, start to add in the components, connectors one by one, part by part to isolate the faulty hardware component.
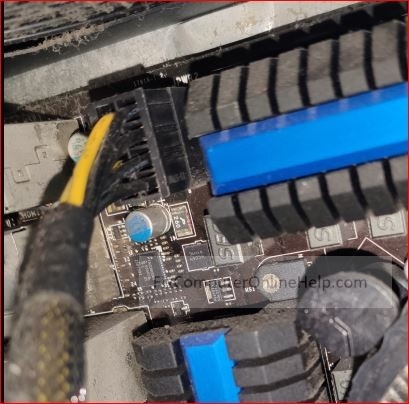
9) Trace the internal front panel power button connector on the mainboard (Advanced troubleshooting)
From the front panel button, there is a cable which is connected to the mainboard. This cable will send a command for the mainboard to take power from the power supply to power on. Remove and reinsert the cable connected to the motherboard to ensure that its not a contact issue.
Generally, it will look like the image below. Colors might not be the same. Labels on the black tab connector will be similar.
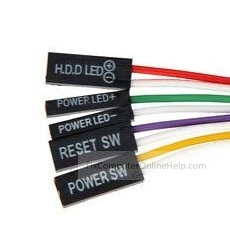
If you are unsure where the front panel connector might be located on the mainboard, refer to the manufacturer’s specific motherboard manual. In the manual, you should see some image (below). And typically these connectors are called system panel connector or front panel connector or casing connectors.

10) Use the reset button instead of the front power button (if system has a reset button)
Instead of using the front power button, use the reset button to attempt to power on the system. Remove the Power SW connector and swap it with the “RESET SW”. Press the reset button to attempt to power the desktop system on. If its powers on, possibility the physical power button on the front panel is faulty.
11) Jumpstart the mainboard (Advanced troubleshooting)
If you have tried the RESET SW above and it still doesnt work, remove any connectors which is connected to the “Power Button” connector on the mainboard. And use the tip of your screwdriver to touch both the metal pins. If this works, attempt to connect the power or reset connector and try again (step 9 and 10)
If you have troubleshooted using the above 11 step hardware troubleshooting guide and your desktop pc is still not able to power on, there is a high possibility that the internal hardware component could have failed.
Which could be typically either the internal power supply or the mainboard in this scenario.
12) Get a new or borrow another power supply unit.
For most desktop systems, the mainboard requires a 24 Pin and 4+4 CPU to power the system on. Get a unit that supports these connectors, while keeping the bare minimum component setup as mentioned in step 8 and attempt to turn the system on.
If it doesn’t work, it will be some hardware issue beyond the layman. Consider to bring it over to a computer repair centre and have them advise on your problem.
This portion of hardware troubleshooting assumes that the system is newly bought or assembled
Generally, if its a brand new system, it will be covered by warranty which saves you the hassle of troubleshooting by yourself.
And for certain systems, they have a warranty seal, which if its broken, warranty is considered void. Hence do proceed with due diligence.
In this situation, you can only perform external troubleshooting. Which will be Step 1-5 as shown above.
If it fails, contact the shop or the manufacturer for troubleshooting guidance.